
Mango Script Tutorial — First Script
<< Previous Tutorial — Overview Next Tutorial — Recording With and Without User Input >>
Using the Script Manager, you can record and playback a series of actions. Almost all actions in Mango are recordable via the Script Manager. For a quick demonstration, follow the below steps.
 From the Toolbox, go to Open > Open Sample Image. In the viewer window, go to Plugins > Scripts > Record Script > Without user input. You should now see the Script Manager recording.
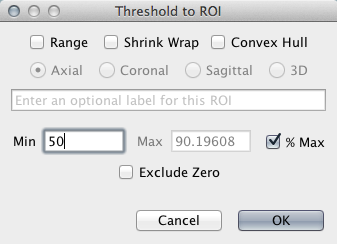 In the viewer window, go to ROI > Threshold to ROI. Select "% Max" and enter a minimum value of 50. After the ROI has been created, right-click inside the ROI and select
Analyze from the context menu. Finally, tap the 'o' key to move the current coordinate to the origin.
In the viewer window, go to ROI > Threshold to ROI. Select "% Max" and enter a minimum value of 50. After the ROI has been created, right-click inside the ROI and select
Analyze from the context menu. Finally, tap the 'o' key to move the current coordinate to the origin.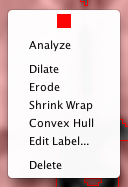
Next go back to the Script Manager and press Stop. Enter "My First Script" inside the script name box, then press Save.
Congratulations! You have created your first Mango Script. To test the script, open a new image, then find "My First Script" in the viewer Plugins > Scripts menu. Select it and you should see the actions you recorded performed automatically in the new viewer.
Many sequences of actions are recordable, but to tap into the full power of this scripting feature, you will need to get your hands dirty and manually edit the script. Let's try. First, click the Edit button (the pencil icon) in the Script Manager. You should now see
something like this.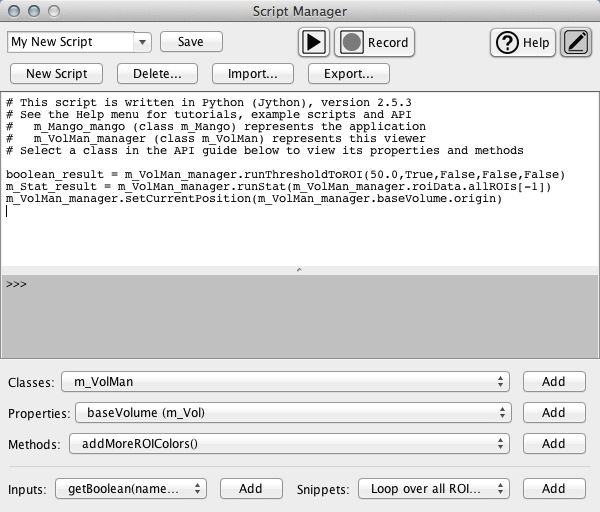
Note the two text areas. The top text area is where you edit the script. The bottom text area is where any output messages will be displayed.
Below all the text area are selection boxes that help you navigate the Mango Script API.
Let's try editing the script. First, note that there are many script lines and the top ones begin with a hash (#) symbol. Any script lines that start with a hash are considered comments and are simply ignored when the script is executed. So let's also ignore them and concentrate on the last 3 lines.
Even if the script syntax looks foreign to you, it should be easy to pick up on the action-sounding words in each of the three lines: "run threshold to roi", "run stat", "set current position". It's easy to see that each of these lines corresponds to one of the actions we recorded earlier.
Now let's change the last line from...
m_VolMan_manager.setCurrentPosition(m_VolMan_manager.baseVolume.origin)
... to...
m_VolMan_manager.setCurrentPosition(m_Stat_result.maxCoordinate)
Now instead of setting the current position to the image origin, we move it to the maximum coordinate found in the analysis. Open a new viewer and run the script again. You should now find that after it creates the ROI and runs the analysis, it moves the current coordinate to the maximum.
<< Previous Tutorial — Overview Next Tutorial — Recording With and Without User Input >>